Lithium smart board display wiring tutorial takes R32S board type as an example
更新时间:2020-05-30 11:16:30•点击:33465 • service support
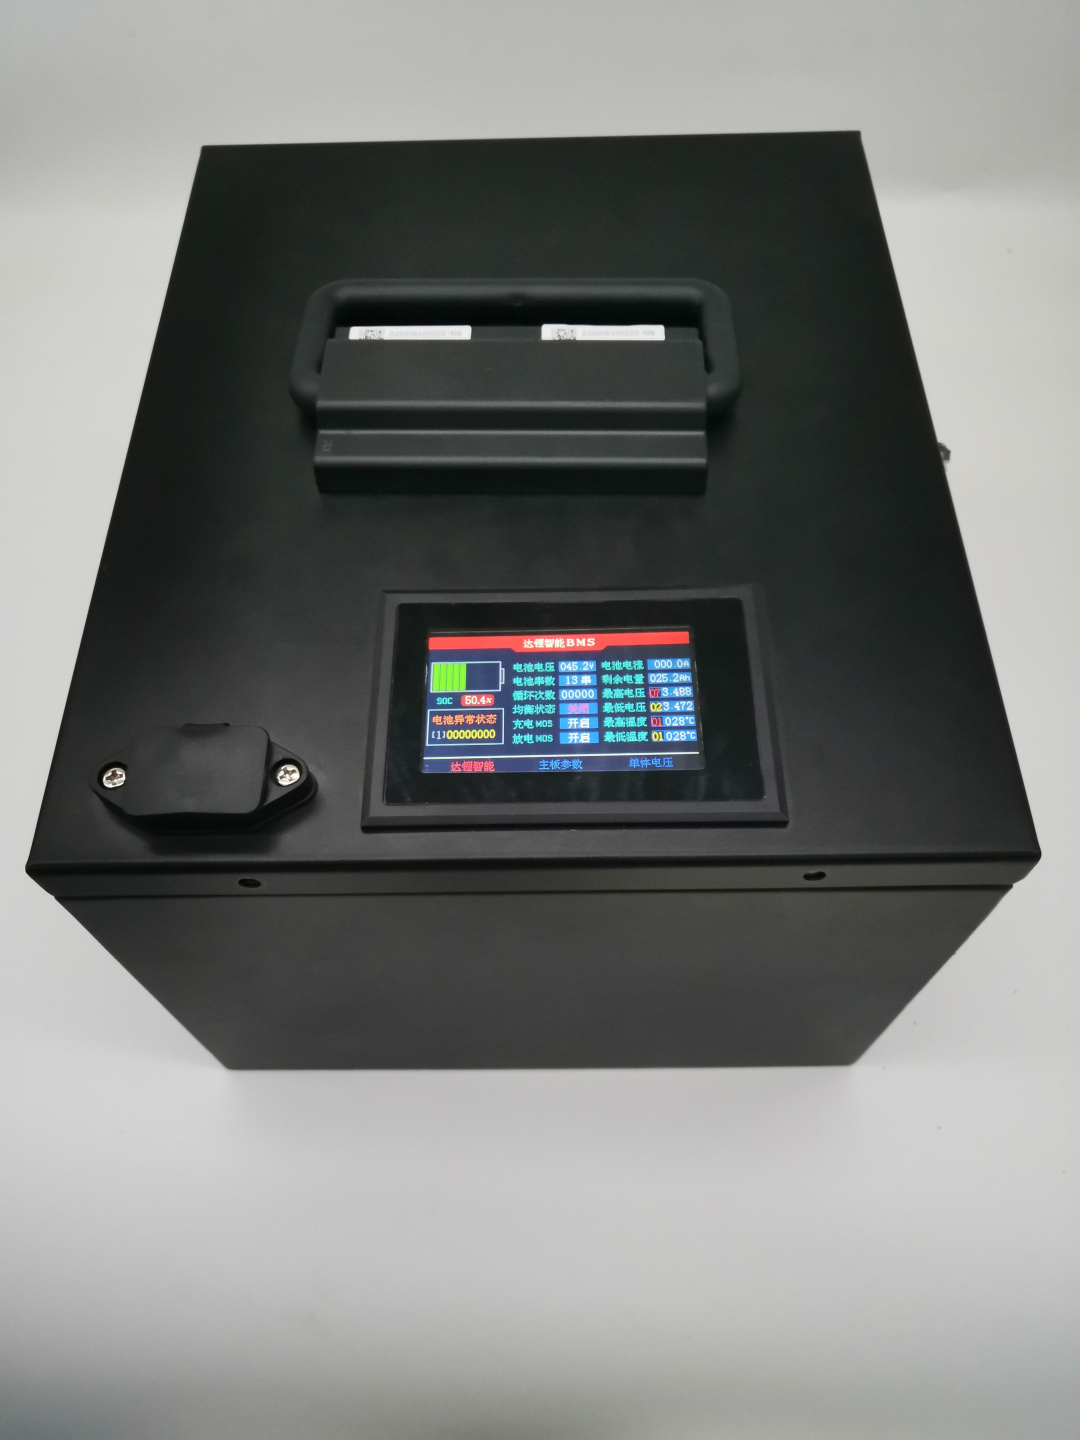
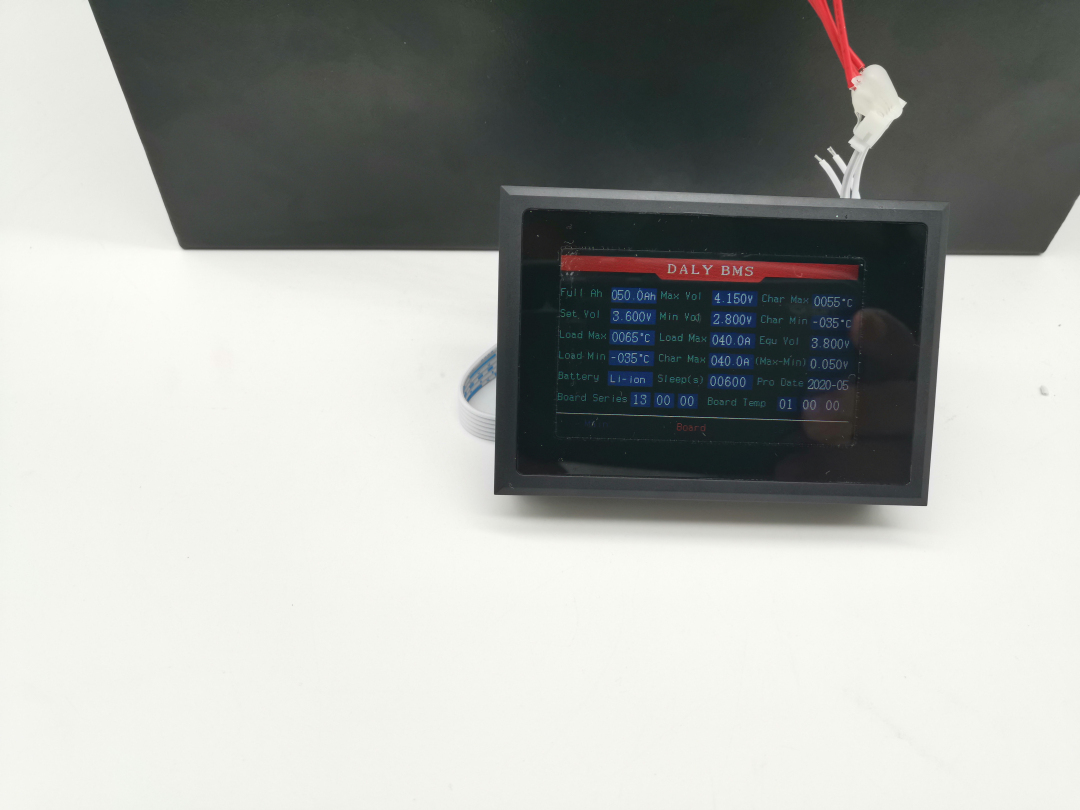
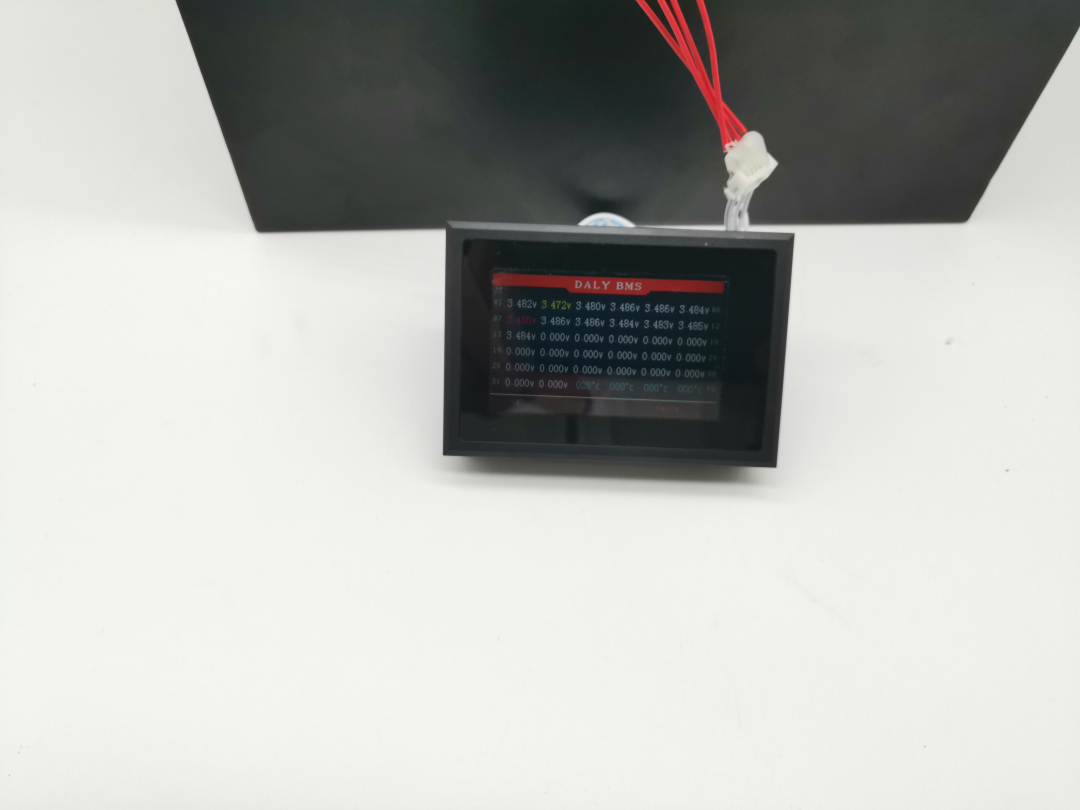
Take R32S smart board type as an example to introduce the connection to the display. Lithium battery data can be seen intuitively on the battery.
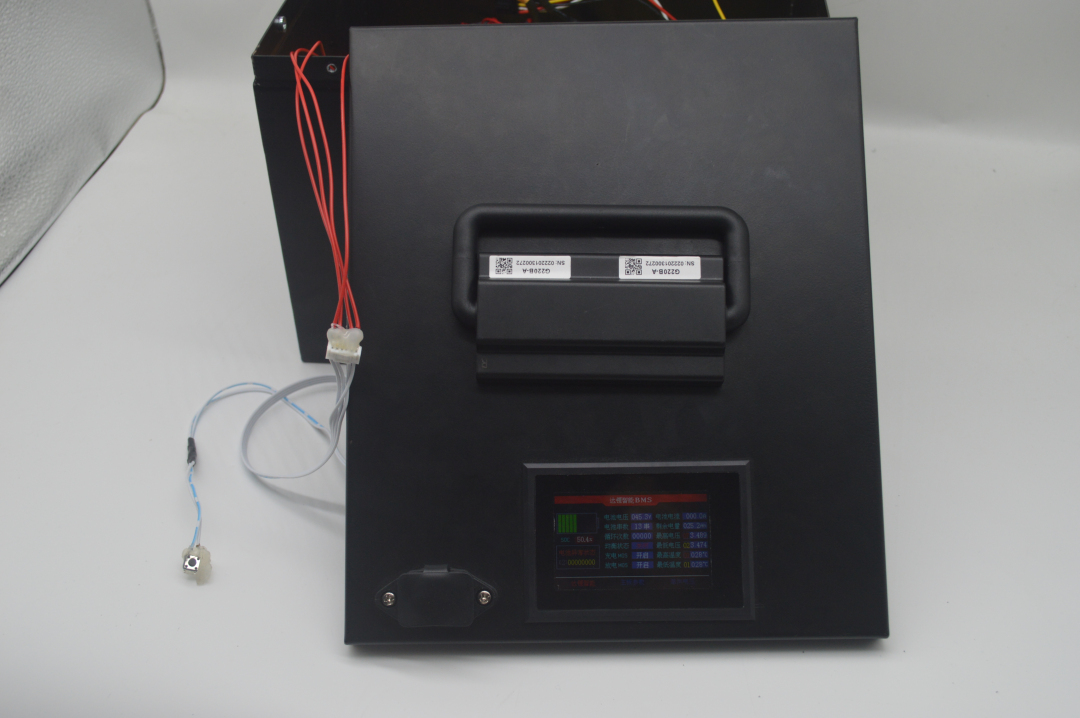
The last installed picture
The following describes the installation tutorial.
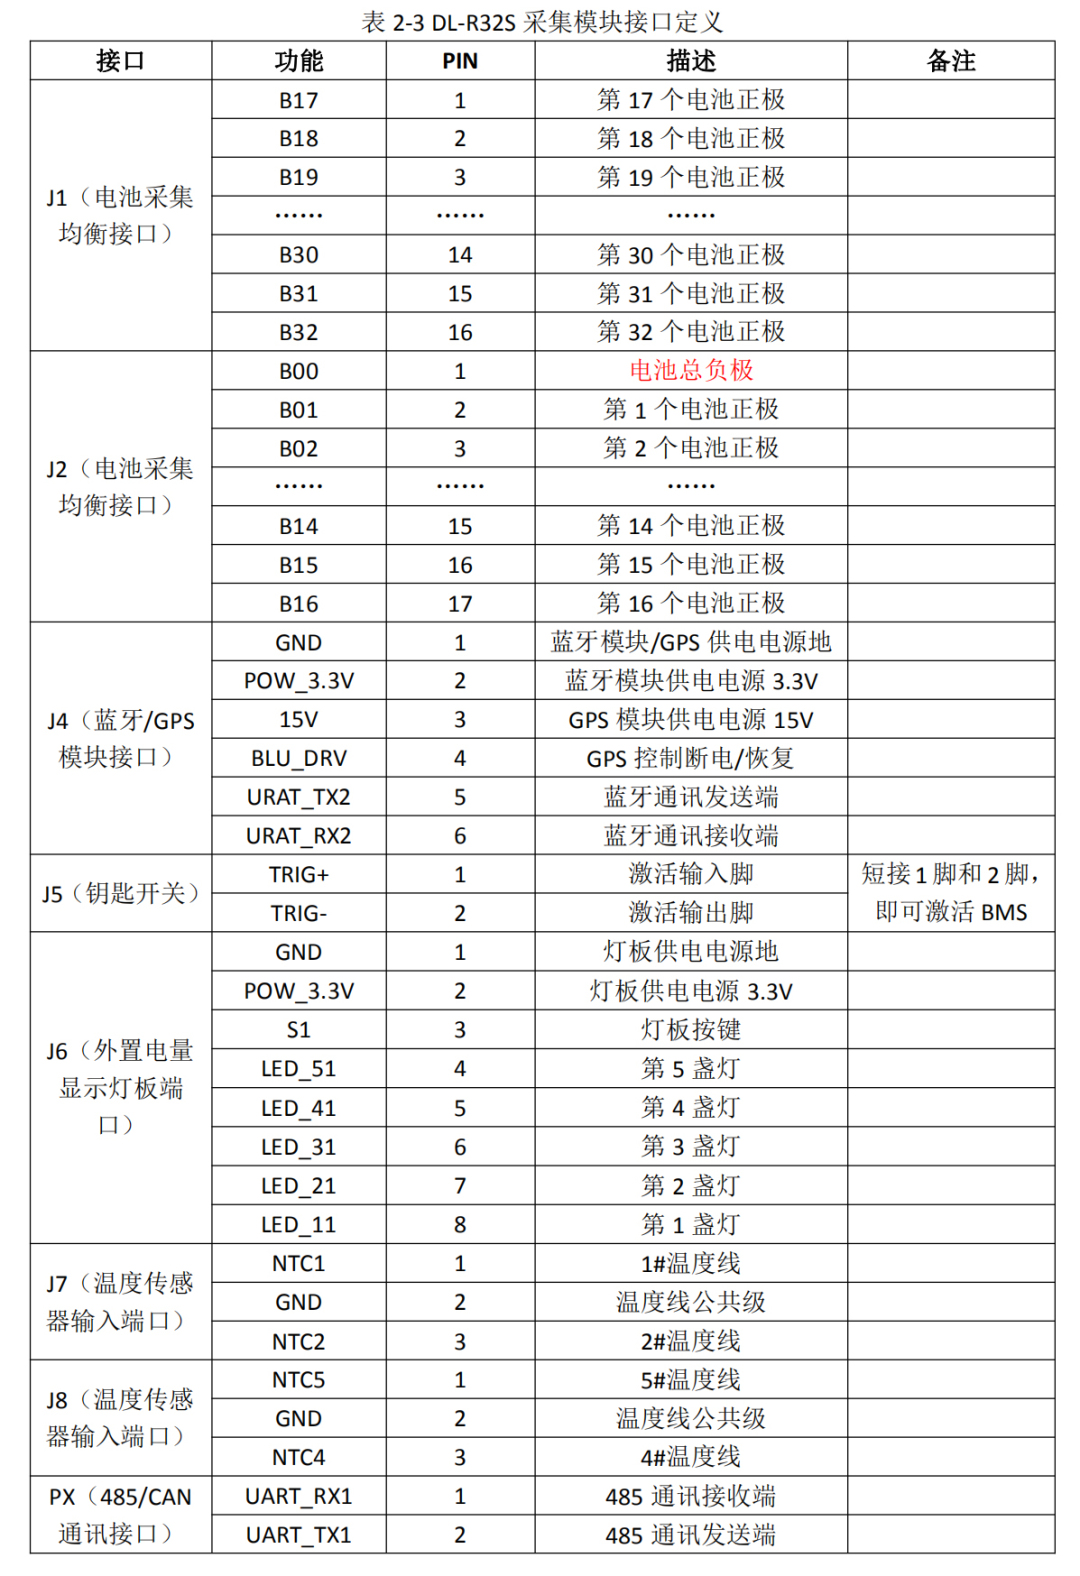
Step 1, check the instruction manual. If not, you can ask the salesperson for it. Hit the definition of each interface.
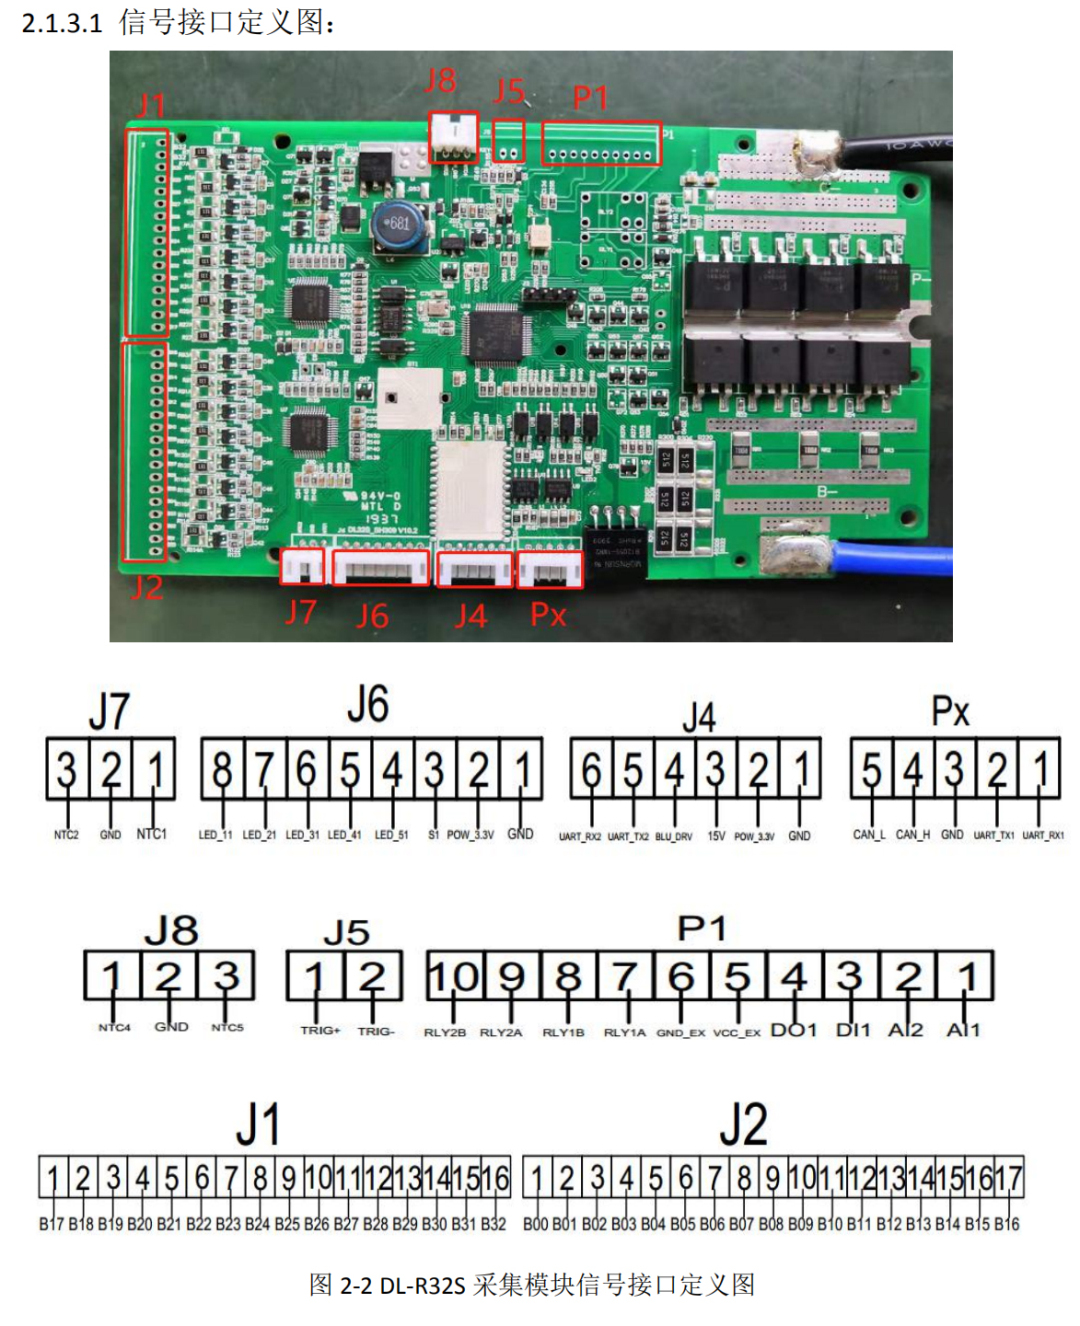
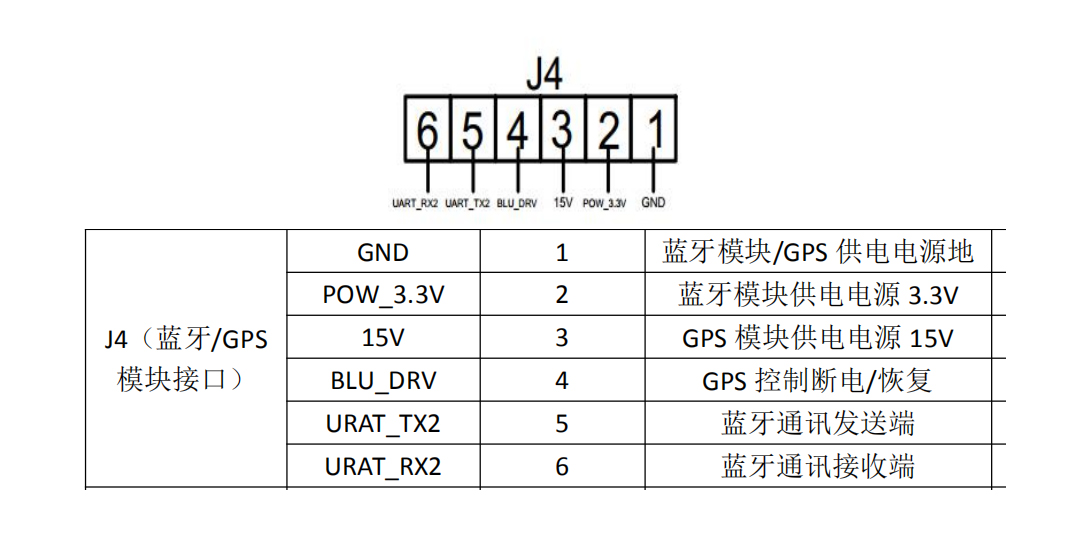
Note: The interface to the display here is J4, and J4 has 6 PIN pins. Below you can see the various wiring methods of the J4 interface.
Step 2, find the display, we can see the back of the display, there are wiring instructions.

Step 3, connect the wires according to the following instructions.
The negative power supply GND is connected to one place (GND) on J4.
The data transmission TxD is to be received at 6 places on J4 (UART_RX2).
The data receiving RxD is to be connected to 5 places on J4 (UART_TX2).
The positive power supply VCC is to be connected to two places on J4 (POW_3.3V).
The remaining two wires are connected to the 2 end of the switch to realize the interface switching. (The switch needs to be purchased by yourself)
Step 4: After connecting the four signal wires, the display will be on. The remaining two wires only need to be connected with a switch to switch the interface.

Step 5: After connecting the wires, fix the display to the battery compartment. The installation is complete.
Recommended Reading
-
展会
2025-01-20 11:50:50•86318 次
-
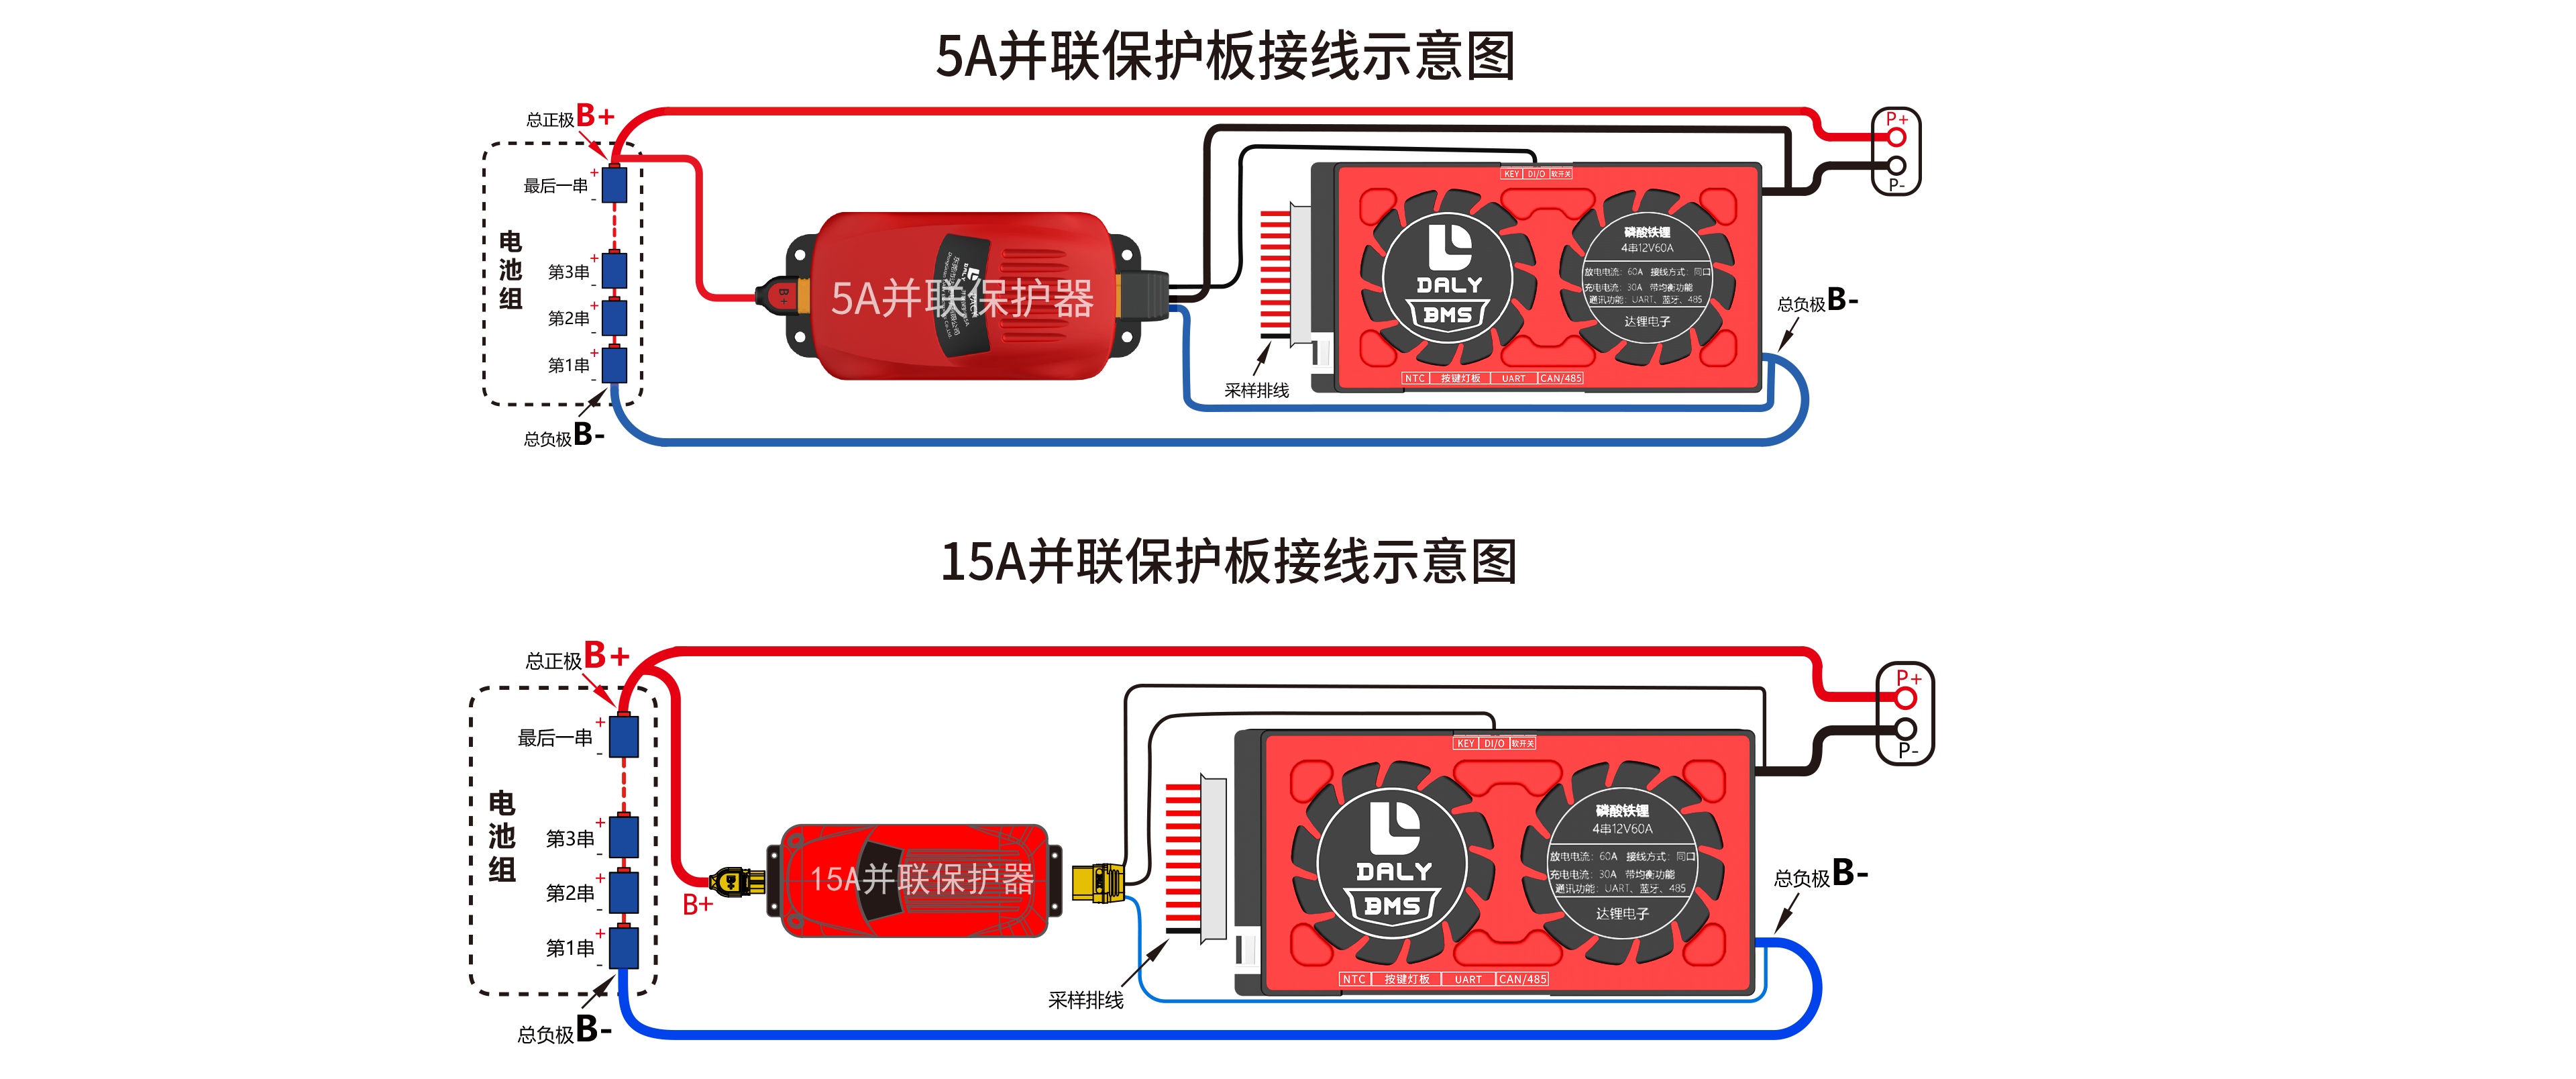
The wiring method of 15A parallel BMS module
2022-01-12 17:02:57•70404 次
-
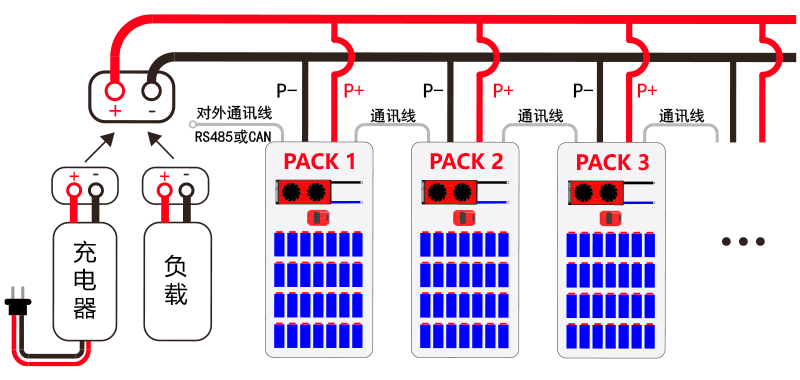
PACK parallel BMS wiring diagram
2022-01-11 11:22:26•337022 次
-

The wiring method of 5A parallel BMS module:
2022-01-11 11:19:01•150527 次


